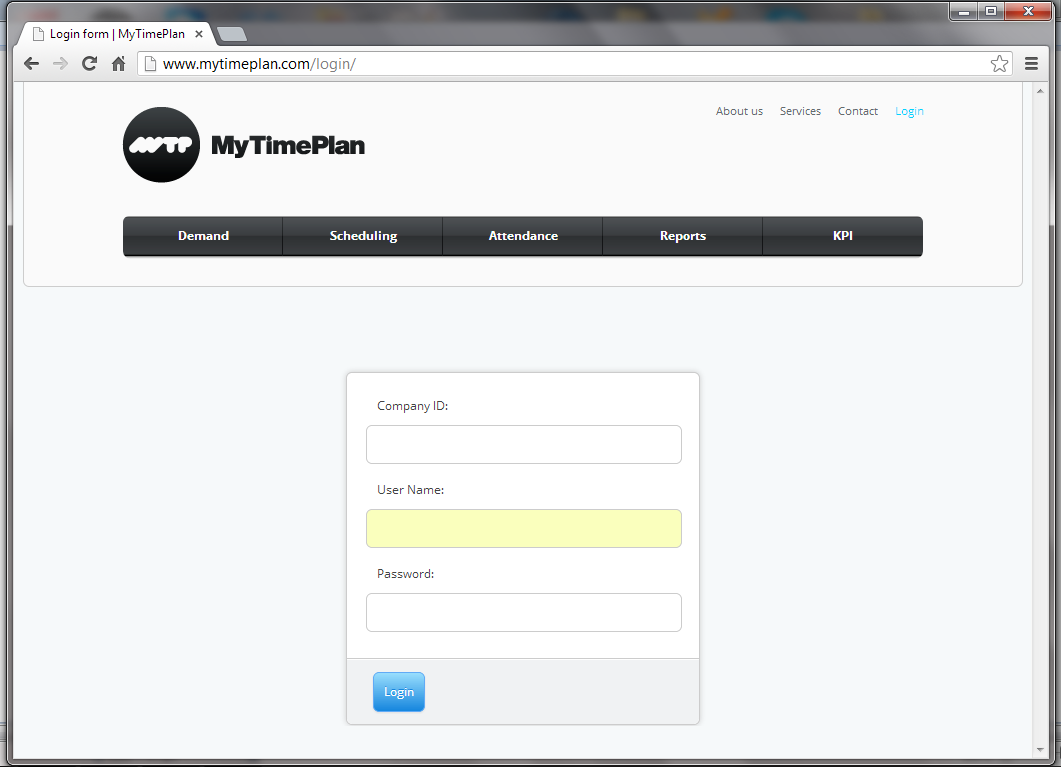
Log in!You can log in from any Internet Browser, all you have to do is visit www.MyTimePlan.com . At the top of the page, enter the name of your company, your username, and your password. If you don’t know your details, contact your supervisor. |
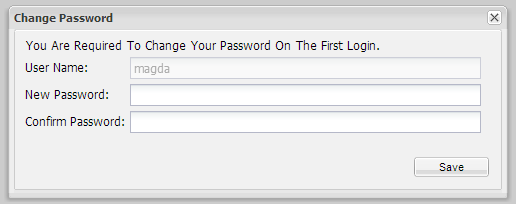
When you’ve entered your correct details for the first time, you will come to the Change password window. It’s very easy – Enter your new password, then confirm your password, once to choose, and once to confirm. Your new password must contain at least 6 characters. When you’re finished, press the Change button.
Let’s plan your company scheduleFirst of all, let’s talk about stages. There are four stages in the planning menu, and it’s important to know how each one works. In the MTP schedule, each date field is underlined by one of four colours, with a different meaning for each. |
StagesFirst of all, let’s talk about stages. There are four stages in the Time menu, and it’s important to know how each one works. In the MyTimePlan schedule, each date field is underlined by one of four colours, with a different meaning for each. Stage 1 – Green – Wishes – Employees put in their wishes regarding working hours and free time down to 6 weeks before the start of the planning period. The only restrictions that each individual has to observe at this stage are the minimum requirements laid down in collective agreements. Stage 2 – Optimisation by the staff (Yellow) – Six weeks before the start of the planning period, the system automatically moves to Stage 2, in which employees can easily see the shifts that are over- or undermanned. The illustration shows how employees can move themselves from overmanned shifts to undermanned shifts, keeping a degree of control as to how they schedule their time while meeting the demands of the workplace. Step 3 – Optimisation by the manager (Red) – Five weeks before the start of the planning period, the system automatically moves to Stage 3, in which the manager sees the remaining cases of over- or undermanning and makes the necessary adjustments for optimal results. Stage 4 – The final shift schedule (Red) – Four weeks before the start of the planning period, the system automatically moves to Stage 4. Your employees’ working hours and free time are now clear, based as far as possible on their own wishes and taking account of the minimum requirements laid down in their collective agreements. |
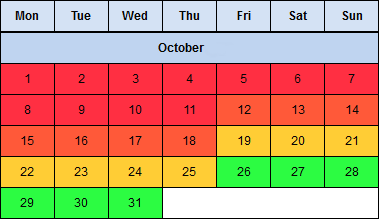
The Planning MenuAs you will remember from the Stages guide, you can make changes in stages 1 and 2. The length of each stage is up to your company’s preferences. Our most commonly used stage breakdown looks like this: Stage 4 [Final]: – 11.10.2012 Stage 3 [Admin OPT]: 12.10.2012 – 18.10.2012 Stage 2 [Emp. OPT]: 19.10.2012 – 25.10.2012 Stage 1 [Emp. Requests]: 26.10.2012 – First, you must choose the period of time you want to be visible in the schedule. You can use our proposition of periods, or set your own. The time periods will be colour-coded in exactly the same way as you can see above – Green, Yellow, Orange, and Red. From the various drop-down menus, you can choose which stage you would like to view. The periods drop-down menu (see below) will show you the exact dates of each stage, the same information which can be seen in the calendar view. |
 |
 |
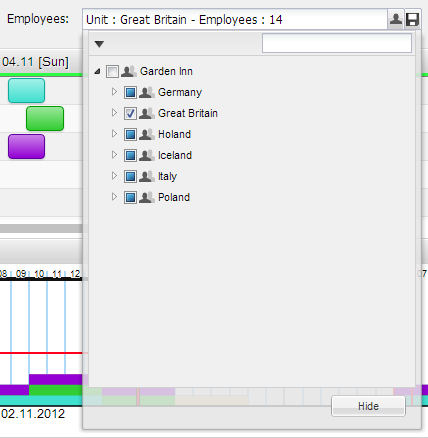
Create filter in the best way for yourself!Last thing you have to do, it is to choose filter. Click on filter, in tree diagram choose department you want to see. You can also mark in tree field which you want to see in schedule. By double click you will mark only employee or department you want to see.
Filter shows employees that had employment until 30 days ago and that will have employment 300 days ahead. |
 |
| Also you can also put phrase in search box and search. The phrase it can be employee’s name, surname, department name, SSN number, contract name. | 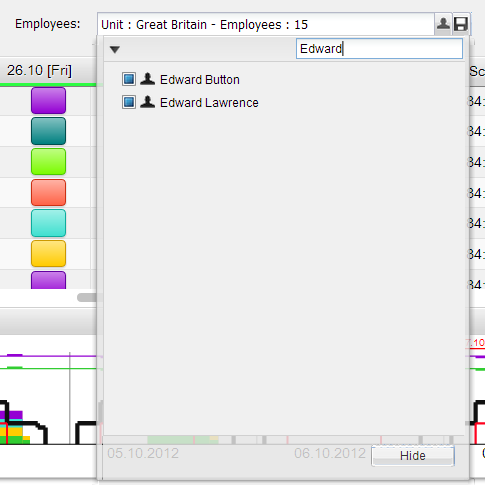 |
|
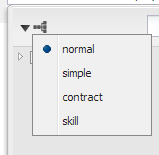
There is very useful tool which allow you to sort your employees in the Tree Diagram by categories such as Normal, Simple, Contract, and Skill. |
 |
| Here’s what it would look like: |

| You can create your own filter by clicking at |  |
| In edition filter window mark unit or employees which you want to see and name of filter, and its done. | 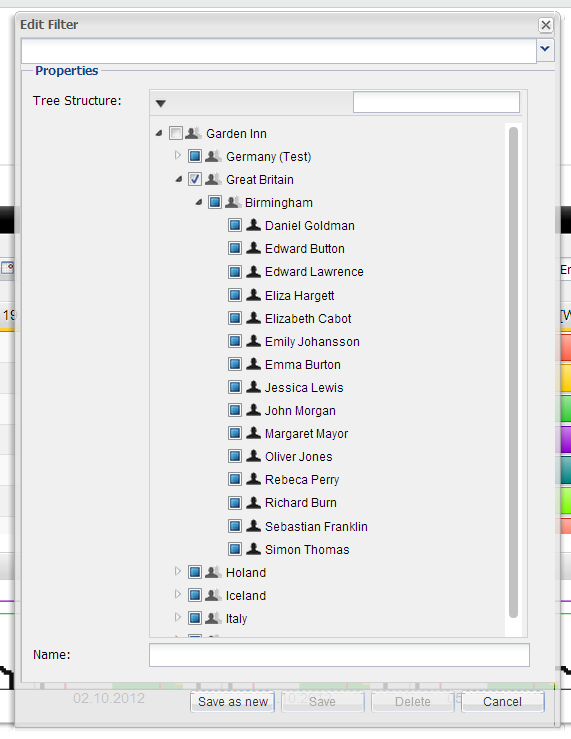 |
PlanningIn the Planning mode, you plan your company’s schedule, and as we’ve already seen, this can only be done during stages 1 and 2. When your schedule reaches stage 2, it’s the last window to manage your company’s working hours and private time. |
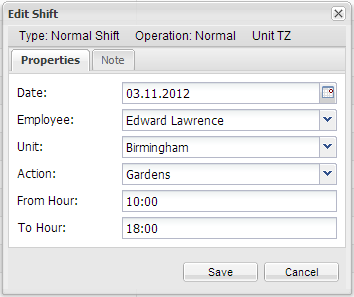
How to add your first shift?It’s simple. First, click on the field in the schedule as shown below on 03.11 [Sat].  |
|
Here you will see the Edit Shift window. In this window, you choose the department, employee job and the shift time. That’s it! You have already created your first MyTimePlan shift.
|
 |
Add identical shiftsIf you are going to add identical shifts, you can save time by holding the SHIFT button and clicking the date fields where you want to created new shifts. Then in the Edit shift window, set up your shifts’ properties. Also, In the same way you can edit or delete shifts. You need hold SHIFT button and click as many shifts as you want to edit. |

 |
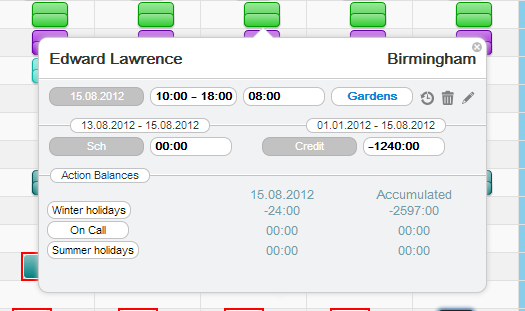
Shift ToolTip optionsYou can always get helping by using the MyTimePlan shift ToolTip. Using the ToolTip gives you direct access to edit or delete the shift, and view the history of any changes to shifts. The window, inform you about 1. Add attendance 2. History of changes 3. Edit Shift 4. Delete Shift |
 |
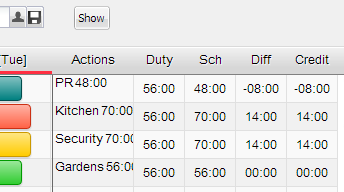
The shift ToolTip InformationThe Schedule ToolTip gives you information about an employee’s job and department, Shift Date, Shift Hours, Scheduled Hours. The Scheduled Hours (Sch) figure shows the number of hours an employee is given over in the time period which is defined in the schedule. The Credits are showing the number of hours an employee is given over a whole working period. ToolTip gives you possibility to check the total number of hours for Action Balances such as winter holidays, on call, and summer holiday. More information can be found by viewing the extra table which appears on the right hand side of the screen. Here, there are five columns which show you at a glance about your employee’s Actions, their Duty Hours, their Scheduled hours, the Difference between their duty and scheduled hours (Diff) and any working Credits they may have.
|
 |
Extra Table InformationThe extra table which appears on the right hand side of the screen. Here, there are five columns which show you at a glance about your employee’s Actions, their Duty Hours, their Scheduled hours, the Difference between their duty and scheduled hours (Diff) and any working Credits they may have. Actions – The job and number of hours the employee will be completing. Duty Hours – The number of obligatory hours the employee is contracted for in each work period. Schedule Hours – The number of hours the employee has in the current schedule. Difference – The time needed to either increase or decrease to get to an employees set duty hours. Credits – The number of hours which an employee is either lacking or in credit for since their first day of employment. This amount can include additional hours that can only be added by admin. |
 |
Add Employee AttendanceFrom The Schedule View Toolbar choose Settings > Click Day > Add Attendance, in this way when you will click on a day in the schedule you will get Add Attendance window. It enables you to add to employee attendance. First, click on the field in the schedule as shown below on 03.11 [Sat].
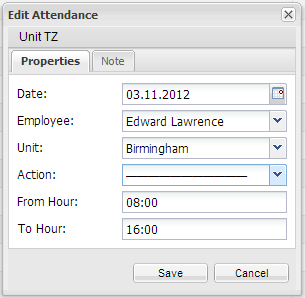
Here you will see the Edit Attendance window.
In this window, choose the date, employee name, the department, employee job and the attendance time. That’s it! You have already created attendance. Note: There are different types of attendances. Read more about Type of attendances. If you are going to add current attendance, set only start time of attendance. Look at screen below.
|
Edit Attendance using ToolTip optionsThe Attendance ToolTip is also a very useful window which offers all the tools to edit an employee’s attendance records. Here, you can edit, and check the history of any changes made to an employee’s attendance. It also gives you information about employee’s Job and Department, Attendance Date, Attendance Hours. |
The Attendance ToolTip options1. History of changes 2. Delete Attendance 3. Edit Attendance |
 |
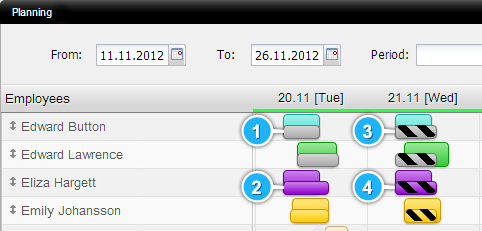
Types of attendanceThis smaller bar it shows whether an employee was present for their shift, and also whether they are currently completing their actions or not. 1. Completed attendance 2. Completed attendance with completed set action 3. Current attendance 4. Current attendance completing their set action Note: If you want to change the colour of your actions, go to the Settings menu > Actions > Edit
|
 |
Error Shifts and AttendancesYour shifts and attendances might have a red or orange frame. This frame informs you about error or the way that’s somebody create attendance. The meaning of the colours can be found in the Shift and Attendance ToolTip Information. 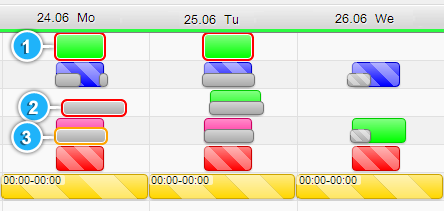 |
|
In the Personnel menu, in the Employees submenu, there is possibility to add and edit an employee. In the Employee Form there is the Attendance Type section, you can define there the way to register the attendance. There are possibilities:
In accordance to employee attendance type, the errors could be meant that employee should not have shift or attendance in its schedule. It depends on the individual employee configuration of the attendance settings. |
|
It means that the attendance had been created manually in the on-line application. The desired attendance can be added by clocking device, desktop application, mobile phone application or web clocking page. |
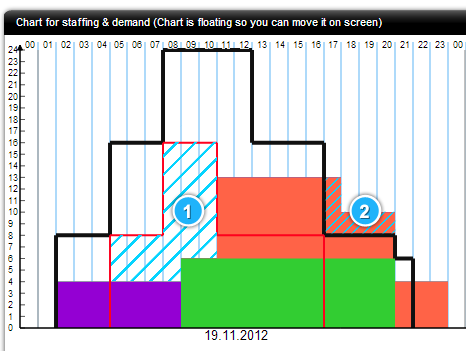
ChartChart for Staffing & DemandThe Chart for staffing and demand displays how many people should be completing an action at a given time. On the left axis you have staff numbers, and at the top, the hours of the given day. The Chart has two lines: The black line shows the maximum staff demand, and red line shows the minimum. The Chart uploads its data from the Schedule module, and this allows you to easily compare the number of employees that are working on one action at one time. The colours in the chart match the colour-coding in the Schedule module, and is an invaluable tool to keep your staffing numbers running smoothly. 1. Anything below the red line shows you are under-staffed for that given time; 2. Anything over the black line, you are over-staffed. Note: The Chart is floating diagram, so you can drag and drop it anywhere on your screen. |
 |
We hope MyTimePlan allows you to manage your work and private life to give you all the flexibility you need. |


