The Schedule View ToolbarSchedule view toolbar contains icons with options that apply to the schedule. From the schedule view toolbar, you can change the looks of it. This menu contains icons: click a day, filter, copy, settings, reports, revert,order optimization and find employee.
|
Icons of the schedule view toolbars
|
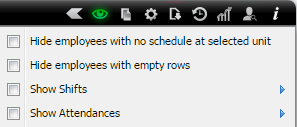
FilterFilter tool allows you to change items displayed on the chart. With this feature you can:
|
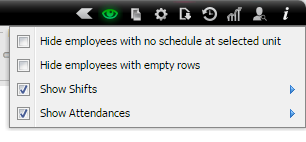 |
| Hide employees with no schedule at selected unit
Use Hide employees with no schedule at selected unit filter to hide employees with no shifts at selected unit. It is useful when an employee works in more than one unit and you do not want to see employee’s shifts which are planned not in your unit. |
| Hide employees with empty rows
Filter will hide emloyees without shifts or attendancess. Use it when you want to see only employees with scheduled shifts or attendances. |
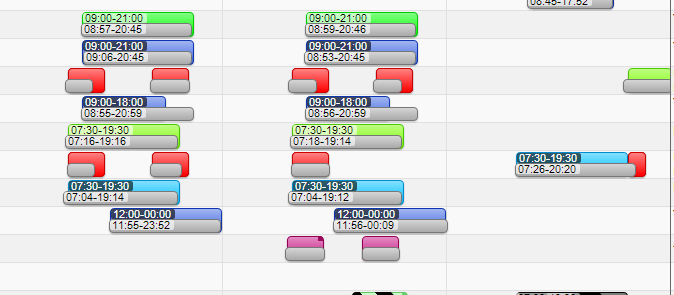
Show Shifts
 |
|
|
Note: Point your mouse at shift with error to find out the reason. You can read it on the shift tooltip. |
Show Attendances
|
 Note: Check your employees’ attendances to find out if there are faulty attendances.
|
 |
|
Note: Point your mouse at attendance with error to find out the reason. You can read it on the attendance tooltip. 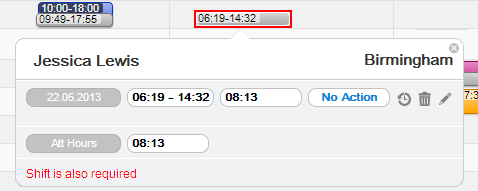 |
| Employees without schedule
Uncheck all filters to display employees without any shifts or attendances. |
 |
 |
Copy ScheduleCopy Schedule window allows you to copy many shifts. It’s very useful when you want to schedule your shifts in the same way for the next couple of weeks. 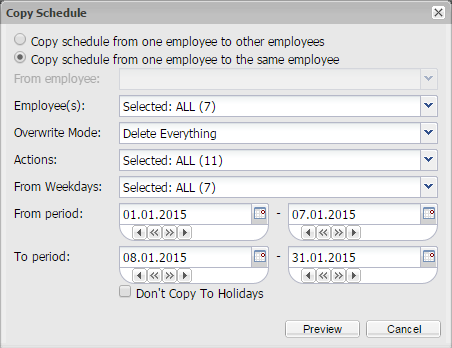 |
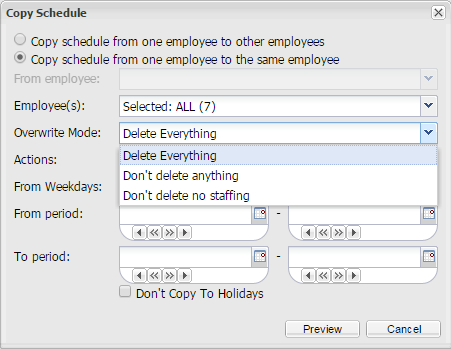
| The Copy Schedule window contains different configuration settings that apply to copy schedule. You can copy your previous schedule or your colleagues’ schedule. Also, there are possibilities to copy only selected week days or actions into specific time period.
You can copy schedule in two different ways, such as Copy schedule from one employee to others employees or Copy schedule from one employee to the same employee. Read more about the Copy Schedule Section: |
Copy Mode |
MyTimePlan takes the schedule data from the selected employee, and transfer it to another employee/employees account . 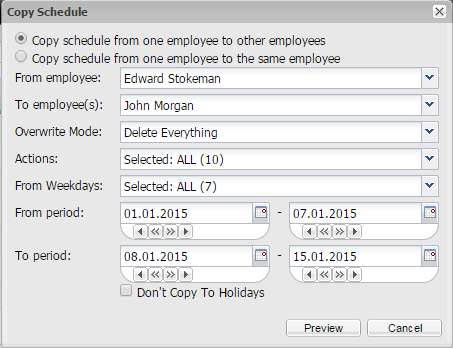 |
| For example, if you want to copy the selected employee schedule to another employee’s/employees’. You have to select Copy schedule from one employee to others employees, than select specific action, and all week days. The last thing to do is to choose your desired time period in the source time period section (e.g. From period: 06.05.2013 – 12.05.2013), then in the destination period choose the dates you would like to copy this schedule (e.g. To period: 13.05.2013-19.05.2013).
It allows you to schedule exactly the same shifts as you had in the previous week. Mark Don’t copy to holidays if you do not want to overwrite public holidays dates. |
MyTimePlan duplicates selected employee(s)’ schedule data from the source time period to the specific time period you would like. For example: you can copy your last week schedule to this week. 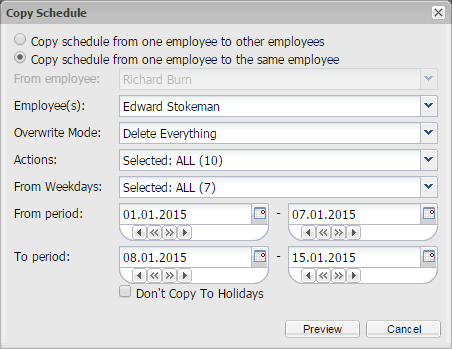 |
| For example, if you want to copy the last week schedule to the next week. You have to select Copy schedule from one employee to the same employee, than select specific action, and all week days. The last thing to do is to choose your desired time period in the source time period section (e.g. From period: 06.05.2013 – 12.05.2013), then in the destination period choose the dates you would like to copy your previous schedule (e.g. To period: 13.05.2013-19.05.2013).
It allows you to schedule exactlythe same shifts as you had in the previous week. Mark Don’t copy to holidays if you do not want to overwrite public holidays dates. |
Overwrite Mode
|
From periodIt is a source period. Select the time period you want to copy. To periodIt is a destination period. Select the time period you want to copy a new schedule. Don’t copy to holidaysIt enables you to copy schedule to public holidays dates, such as the New Year’s Day or Christmas Day.  |
Preview/Apply Coping ScheduleWhen you have configured all Copy Schedule settings, click on the Preview button. |
PreviewPressing the Preview button will show you your scheduled shift changes before you save them. This allows you to check what the schedule will look like first, and to check that you haven’t made any errors. Below you can see examples of preview copied shifts on the schedule.
|
Copy ShiftsBefore  Preview
After
|
Copy shifts with overwrite mode: Delete everythingBefore  Preview
After
|
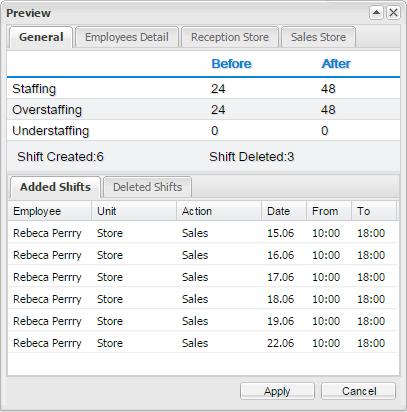
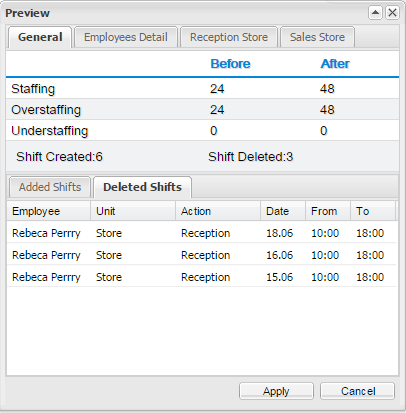
Preview WindowYou can see the Added Shifts in the Schedule Preview, as well as in the Preview Window. The Preview Window gives you information about added shifts and company demand staffing. This window is divided into two parts: General and Demand Information, and a list of added shifts. The General and Demand Information section allows you to check demand for a particular job, and how it looked before and after changes. You can read demand values such as staffing, overstaffing and understaffing. There is also information about added shifts, such as a number of created shifts, deleted shifts, and failed shifts. |
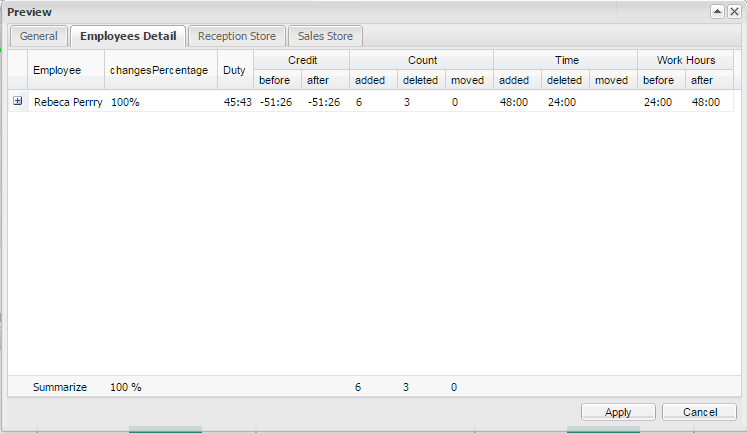
| When you click on tab Employees Detail, you will see how changes in schedule sum up.
Next tab shows a chart for company demand for a particular job. There is a view before and after the changes. |
In the second part of the Preview Window, there is a list of added shifts with all the information about that shift. By pressing the plus icon a drop-down menu will display additional information about the added shift, such as the reason for failure.
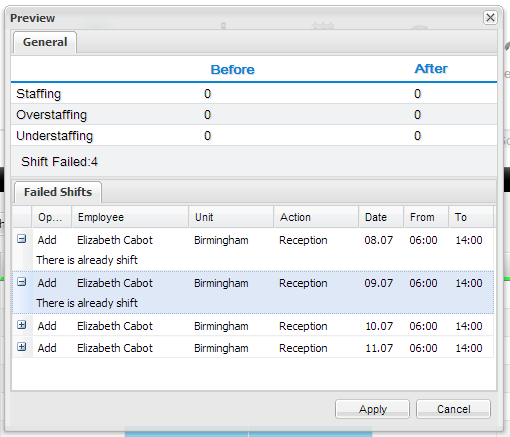 If everything is in order, press the Apply button to confirm and save your changes. |
|
Note: Your shifts may not have been added correctly because of following reasons:
|
Settings option with description:
|
| On the right is what the warning messages looks like: | 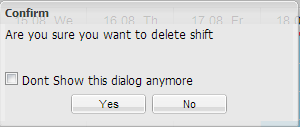 |
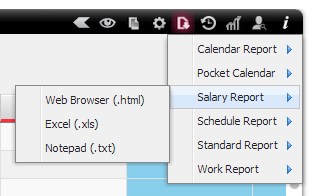
| There are four types of report, such as Standard Report, Schedule Report, Salary Report and Work Report.
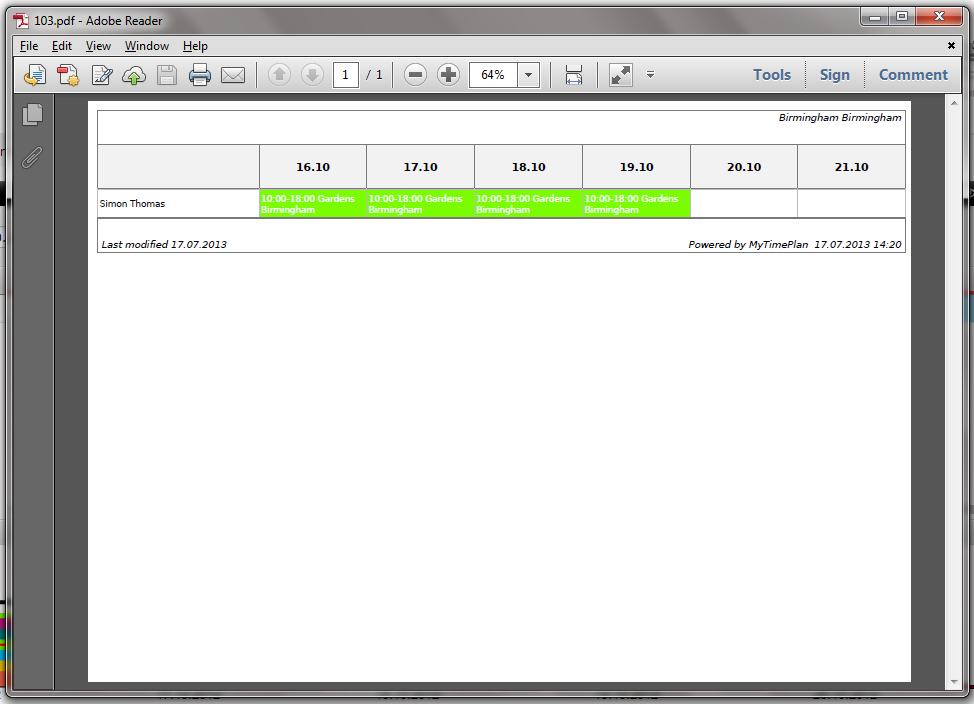
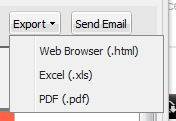
All of reports you can download the specific file format you would like (html, xls, txt, pdf, docx, pptx). You can do it clicking on file format you want to download. Clicking on any of the Report tabs in the drop-down menu will take you to Report Page. |
For example, clicking on the Schedule Report will switch the Schedule Report window.
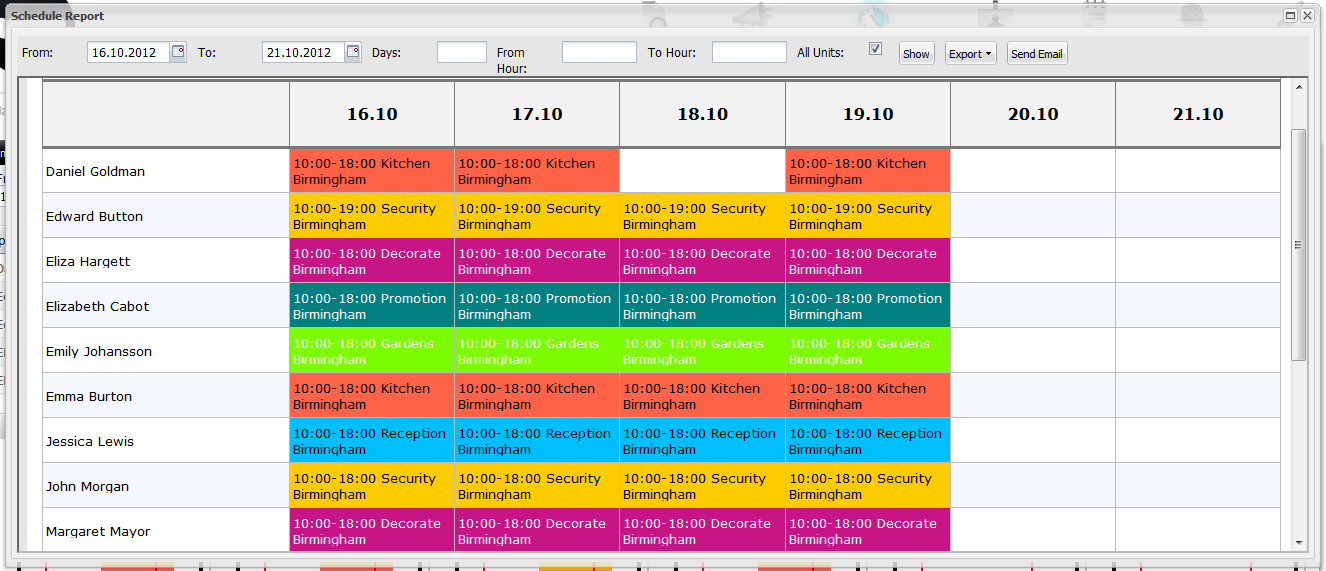 |
Report windowThe Report View is divided into three parts: 1. The Report Toolbar 2. The Report Filtering Toolbar 3. The Report 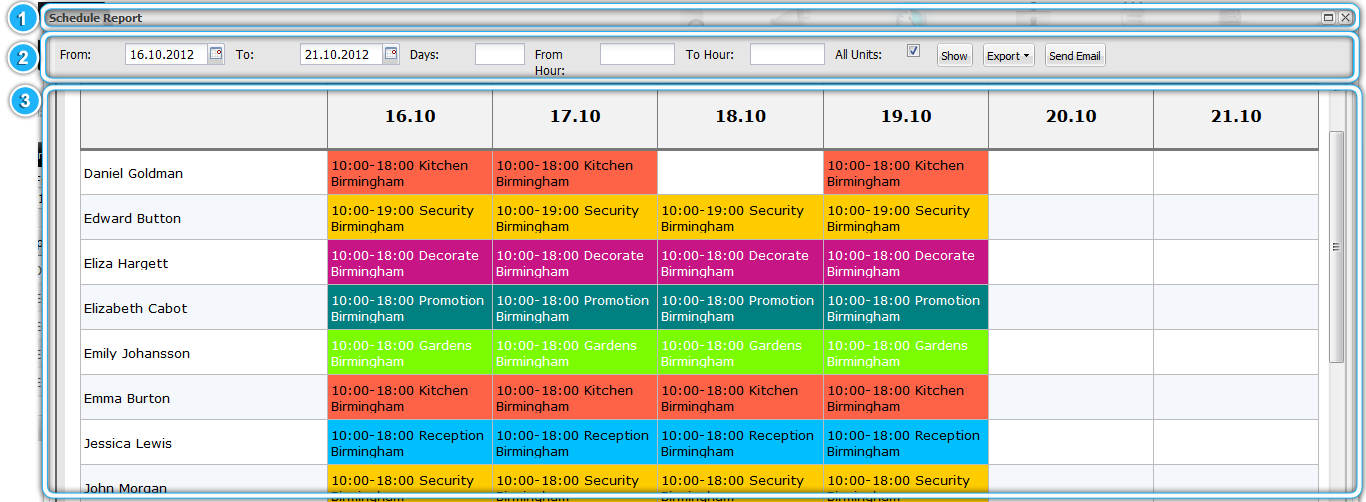 |
Report Filtering ToolbarThere is the Report Filtering Toolbar. This toolbar provides you with options on how you can filter the report that is displayed on your screen. It lets you quickly edit and apply display filters and allows you to choose the time period or all departments to be visible in your report.  There are four filters. First filter is setting up period of time you want to be visible in the schedule. Second, the Day field, you can put here the number of days you want to be visible in one row of the report. Third, the time period, put here the opening and ending hours of shifts you want to see in the report. Fourth, All departments filter, cause that your Report will contain selected employees in all departments they work. It is useful when an employee works in more then one department. |
Export Click on |
 |
Send Notifications Click on 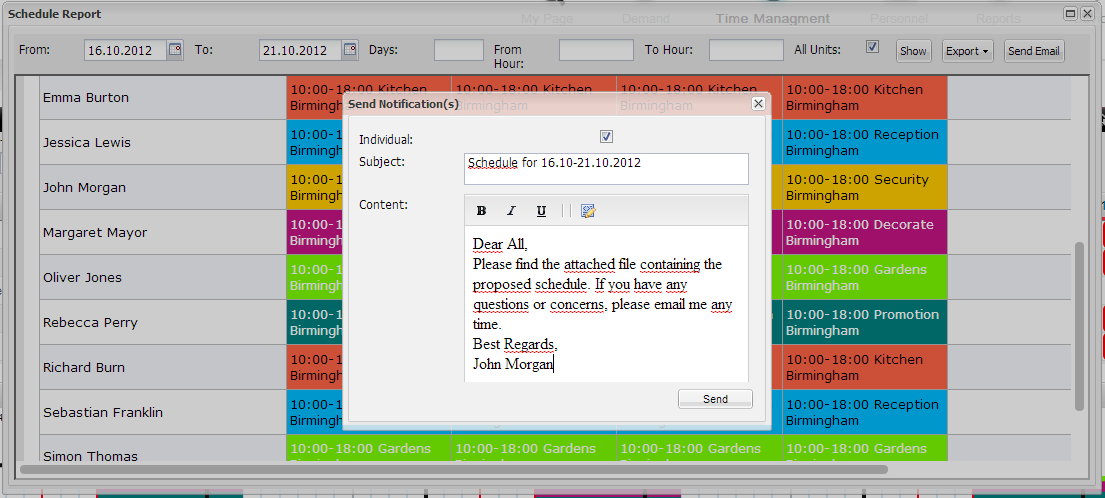 |
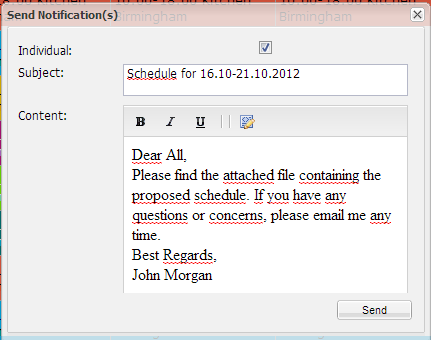
| It’s very easy. All you need to do is write subject and content of your message. If you want to send a report of one employee ,even if there are several of them in report, select the Individual checkbox. Otherwise, you will send schedule of all employees to every employee (Employees will see the Schedule of other employees in report). |
| Your Notification Email will look like that
|
| Your Individual Report will look like that
|
| A report with an unmarked Individual checkbox will look like that
|
Find Employee For ShiftThe Find Employee For Shift window contains a search engine which allows you to find employee without scheduled shifts. You will need to specify the shift’s search criteria, such as the unit, the action, and the time period. This search engine is finding your employees’ shifts which are matching your parameters. As a result, you will have the list of employees who are able to work in specific unit, action and time period. 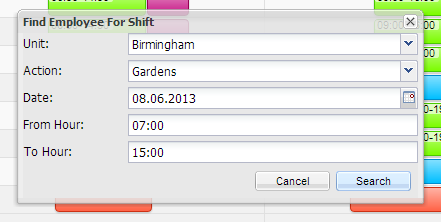 |
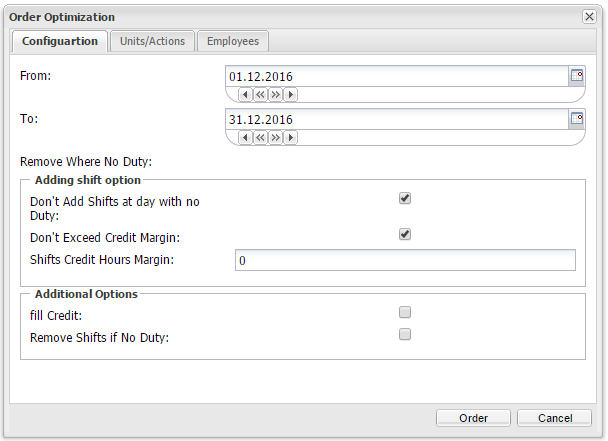
OptimizationOptimization engine creates schedule for employees according to Demand and Allowed Shifts. Depending on settings it also can take into account:
To conduct schedule optimization click on “optimization” icon and choose “order optimization”. Optimization settings window will appear:
“Units/Actions” Tab Choose action for which optimization should be conducted.
“Employees” Tab Choose employees for which optimization should be conducted.
To compute optimization click on “Order” button. |
| The Find Employee Find Shift window uses the search criteria, such as the unit, action, and time period.
Unit – You can search for employee in the specific unit. 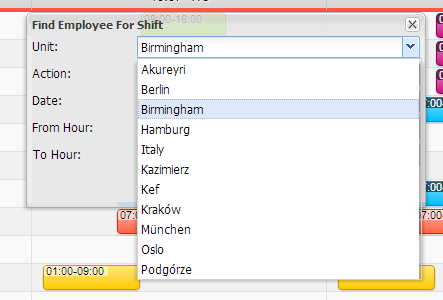 |
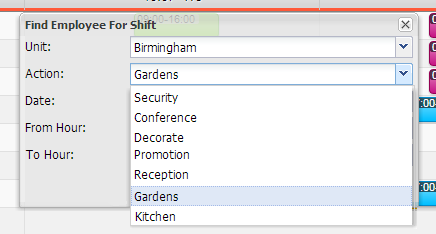
Action – You can search for employee who can work with the specific shift’s action.
 |
| Date – to search for the employee who is available to work in the specific day.
|
Time Period (From/To Hour) – to search for the employee who is available to work in the specific time period.
 |
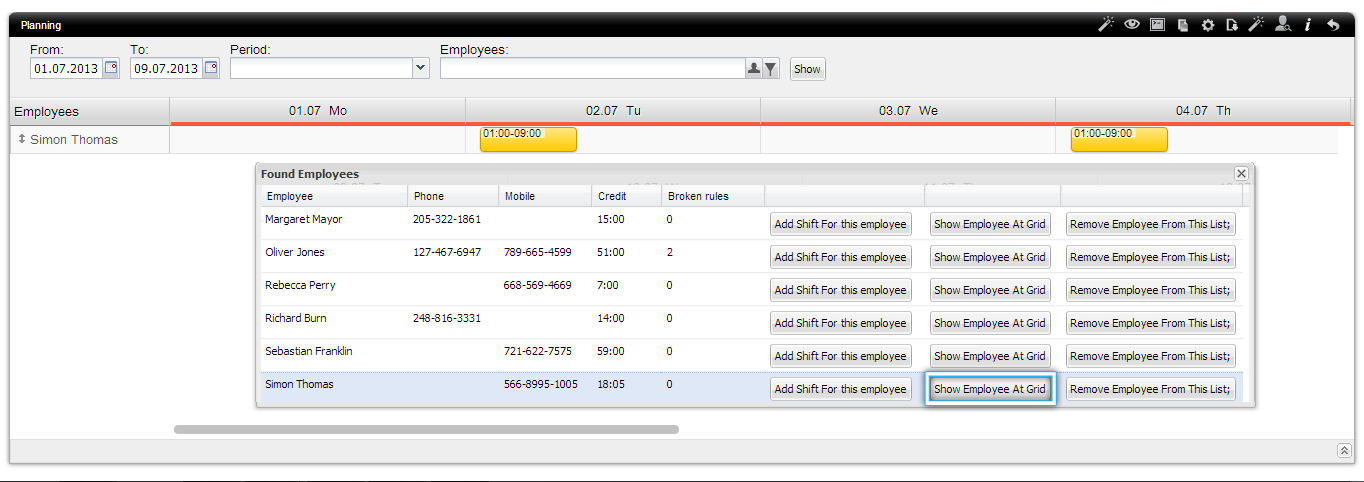
Found Employees windowThe Found Employees window contains a list of employees who match your search criteria. There is information about employee phone and mobile number, credits and number of broken rules. Also, there are buttons which provide you with options, such as the Add shift for this employee, the Show employee at grid, and the Remove employee form this list.
 |
| Elements of the Found Employees window:
Credits – The number of hours which an employee is either lacking or in credit for since their first day of employment. Broken rules – It shows you the number of broken rules. It means that if you add shift to this employee, you will break that number of rules. Add shift for this employee – It applies to the Planning+ schedule. You can add shift to employee which match your search criteria. 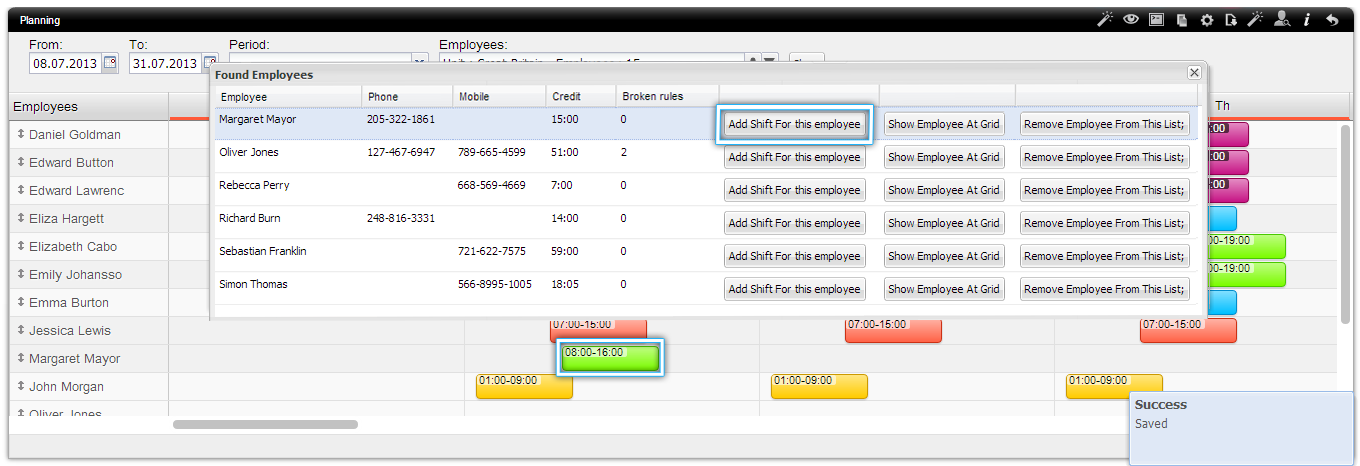 |
Show employee at grid – It applies to the Planning+ schedule. It’s displaying employee’s schedule.
 |
| Remove employee form this list – It removes the employee from the search results list. |
Sort your search resultsBy clicking on the column header of the table, such as employee, phone, mobile, credit, broken or rules, you can sort the employees in alphabetical order. You can also choose the column you want to be visible in the search results. 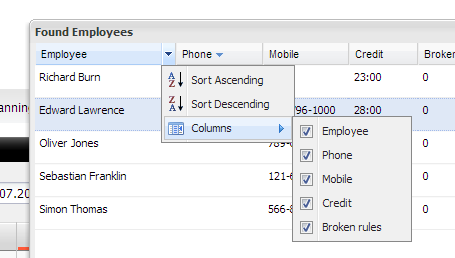 |


