Add new employee
On the right is a view of Add new employee
Follow the example here. Note:All fields in Add new employee form can be edited. If you would like to see more or less fields with the employee details, you can change it in Settings > Extra Fields. |
 |
Change employee password
On the top right of the Employee Page is toolbar where is the Locker Icon. Clicking on that  |

|
Note: Password must contain minimum of 6 characters, include numbers and letters. |
 |
General Employee Information
There are general employee information.
 |
|
Employee Image
To add your Employee Image, please click Choose File button and upload a photo from your computer. Maximum picture size is 100×100 pixels. Then it looks good on your profile. This picture will be used for your Business Card, as well as can be visible to any of your colleagues.  |
|
Address
Add here the employee’s address information. The address field is required.  |
|
Contacts
Add here your contacts like home and phone number or e-mail address.The mobile and E-mail fields are required.  |
|
Time Zone and Language
Select the appropriate Time Zone and Language from drop-down menu. Both of the fields are required.  |
|
User Properties
The User Properties define employee type Time Work. In case of a Time Worker, employee is employed for a time period when will be required to work.  |
|
Attendance Type
 |
|
When Calculating Overtime Duty Hours Come From
Select Duty Hours type  |
|
Hierarchy
Field is required. Select the employee in the appropriate hierarchy.  |
|
Employee Department Name
You can change name of employee department, such as Office, Store, and Account Department. It will be visible in Reports.  |
|
Actions
Field is required. Select the employee job.  Note:
If you would like to add more jobs to employee you have to go to Settings > Actions to add new job. Then go to Settings > Hierarchy to add Job to department branch. |
|
Skills
Select the employee skills.  |
|
Comments
Here you can leave comments about the employee.  |
|
Save changes
Click Save button when you finished adding the employee details. |
|
Employee Contracts
Here we are adding contract to employee. We can choose contract from drop-down menu which contains the same contract list you created in Reports system > Contract > Contracts List.  Click on Add Contract button to add contract
 In the Add Contract window choose the time period, contract type and unit in needed.
|
|
Employment
Edit employment details, such as Employment period, Weekly hours, Full time weekly hours, Employment rate, Duty hour’s type and Active Credits.
Note: Duty hours type you are define in Settings > Duty Hours  Click on Add Employment button to add employment
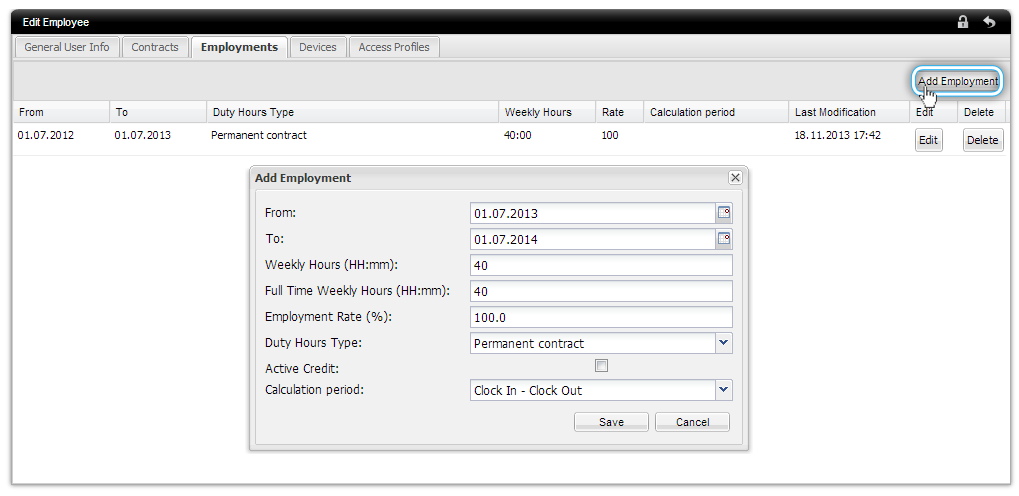 In the Add Employment window select the Employment period, Weekly hours, Full time weekly hours, Employment rate, Duty hour’s type and Active Credits
|
| In the Calculation Period define a rule for time work counting. |
There are four possibilities:
|
 |
|
Lock
Lock date is used to block changes in employees’ data according to salary periods. This feature can be used in two ways:
The Lock date is always end of salary period, even when the end date of report is set to earlier date.
The Lock date blocks:
The only things that can be changed in these elements are “end dates” in contracts and employment, if the date in them is after lock date. |
