The Schedule
In the main part of the Time Management screen is the schedule view. It allows you to check the full schedule of all your employees. You can view, edit, add and delete shifts, add attendance as needed, and keep useful notes about employees. It displays values you previously chose in the schedule filtering toolbar.
On the left side of the Schedule is the Employee List, on the top you can see calendar days, in every day column is your employee’s schedule with shifts and attendances, on the right side of the schedule is Extra Column. |
The meaning of shifts colours in the schedule
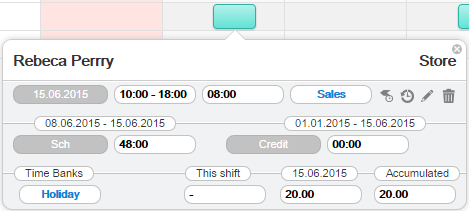
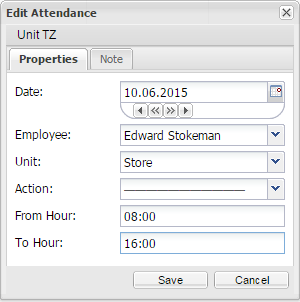
Your shifts are displayed in different colours. The colours show what type of work you will be doing during that shift, with each type of work having separate colour. The meaning of the colours can be found in the Shift ToolTip Information. Your holiday days are always marked as a bar with stripes. You can also see the attendance of staff members in the shift bar, and there are four types of attendance displayed. It shows whether an employee was present on previous shift, and also whether they are currently working their assigned shift or not. |
|
1. Shift |
 |
How to plan your schedule?
In the Planning mode, you plan your company’s schedule, and as you will remember from the Phases guide, you can make changes in Phases 1 and 2 (in the most commonly used phase breakdown). The length of each phase is up to your company’s preferences. |
Adding shifts
It’s simple. First, click on the field in the schedule as shown below on 03.11 [Sat].
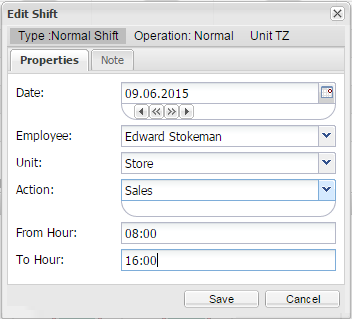
Here you will see the Edit Shift window.
In this window, you choose the department, employee job and the shift time. That’s it! You have already created your first MyTimePlan shift. |
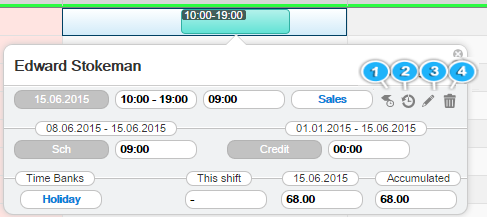
Edit shift using ToolTip’s options
Easy way to change shift is by using the MyTimePlan shift ToolTip. Using the ToolTip gives you direct access to edit or delete the shift, change the shift comments, and view the history of changes. It’s make your planning quicker. |
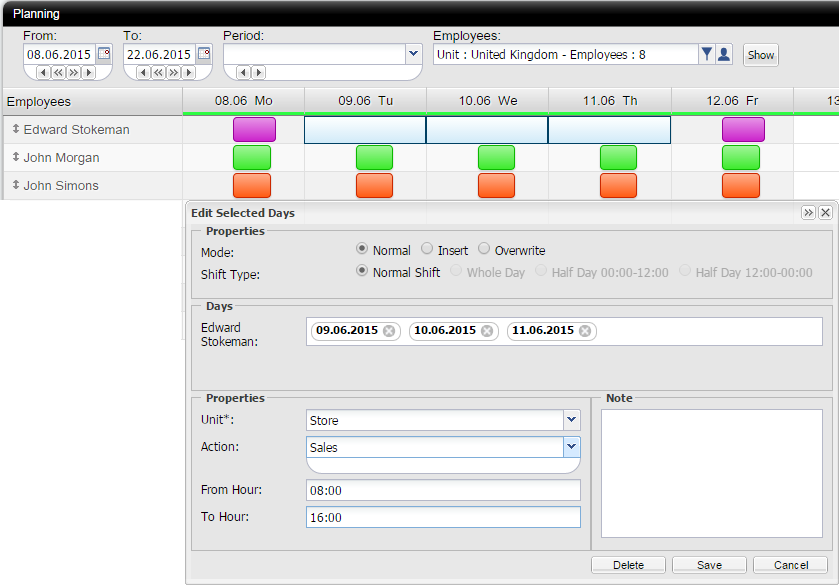
Add identical shifts
|
Related links: |
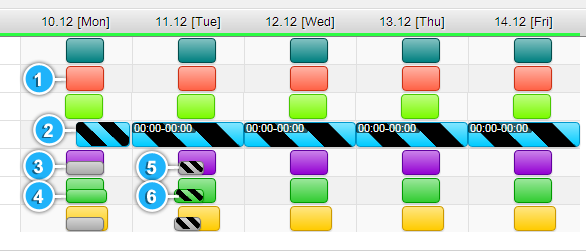
Extra Table Information
Actions – The job and number of hours the employee will be completing.
Duty Hours – The number of obligatory hours the employee is contracted for in each work period.
Schedule Hours – The number of hours the employee has in the current schedule.
Difference – The time needed to either increase or decrease to get to an employees set duty hours.
Credits – The number of hours which an employee is either lacking or in credit for since their first day of employment. This amount can include additional hours that can only be added by admin. |
 |
Add Employee Attendance
From The Schedule View Toolbar choose Settings > Click Day > Add Attendance, in this way when you will click on a day in the schedule you will get Add Attendance window. Now you can add attendance. First, click on the field in the schedule as shown below on 03.11 [Sat].
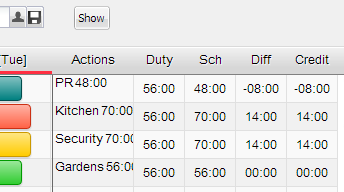
Here you will see the Edit Attendance window.
In this window, choose the date, employee name, the department, employee job and the attendance time. That’s it! You have already created attendance.
Note: There are different types of attendances. Read more about Type of attendances. If you are going to add current attendance, set only start time of attendance.
Look at screen below.
|
Edit Attendance using ToolTip options
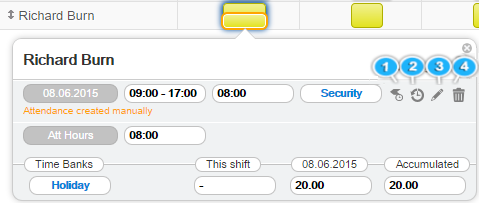
The Attendance ToolTip is also a very useful window which offers all the tools to edit an employee’s attendance records. Here, you can edit, delete, and check the history of any changes made to an employee’s attendance. It also gives you information about employee’s Job and Department, Attendance Date, Attendance Hours. |
The Attendance ToolTip options1. Quick edit 2. History of changes 3. Edit Attendance 4. Delete Attendance |
 |
Types of attendance
There are four types of attendance. Attendance is visible in the schedule as a small bar. It shows whether an employee was present for their shift, and also whether they are currently completing their actions or not.
1. Completed attendance 2. Completed attendance with completed set action 3. Current attendance 4. Current attendance completing their set actions
Note: If you want to change the colour of your actions, go to the Settings menu > Actions > Edit |
Error Shifts and Attendances
Your shifts and attendances might have a red or orange frame. This frame informs you about error or the way that’s somebody create attendance. The meaning of the colours can be found in the Shift and Attendance ToolTip Information. 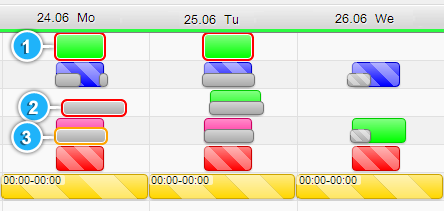 |
|
In the Personnel menu, in the Employees submenu, there is possibility to add and edit an employee. In the Employee Form there is the Attendance Type section, you can define there the way to register the attendance. There are possibilities:
In accordance to employee attendance type, the errors could mean that employee should not have shift or attendance in schedule. It depends on the individual employee configuration of the attendance settings. |
|
It means that the attendance had been created manually in the on-line application. The default attendance can be added by clocking device, desktop application, mobile phone application or web clocking page. |


